Drum Overhead Techniques for Incredible Sounding Drums
Reading time: 5-7 minutes
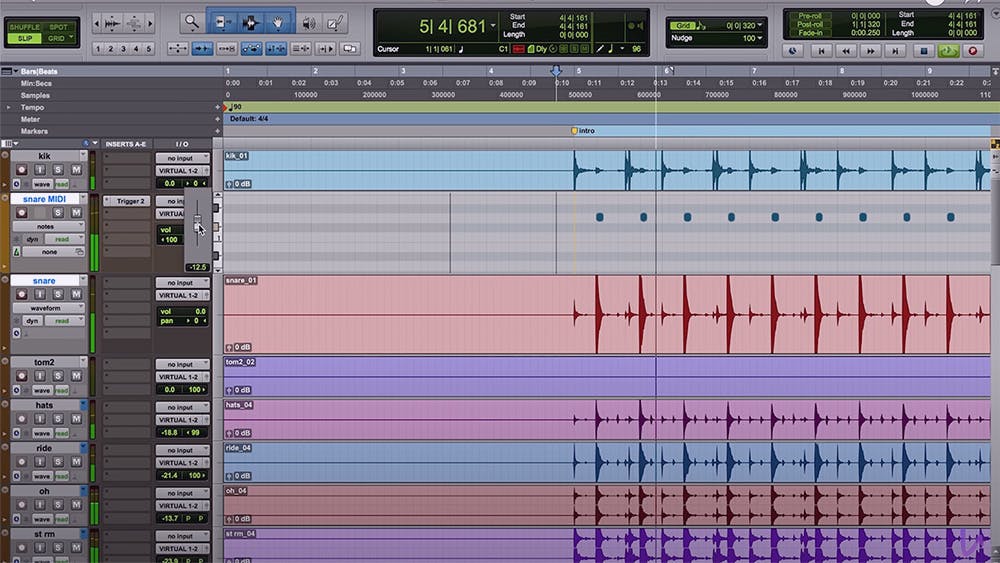
I like to think that drum overheads capture the bulk of the sound for the kit. This isn't always the case, as it depends on the style and the engineer. But for the most part, the overhead mic placement is where you get the big picture of the kit.
So let's talk about a few drum overhead techniques you can use to get a great drum sound.
XY
The setup is pretty well exactly as it sounds, put the mics right next to each over the kit, with one mic pointing towards one side of the kit, one pointing the other. The almost form a "V" when done properly.
The big advantage to this method is that the phase correlation between the two mics is nearly perfect. If the two mics are summed to mono, such as though a phone speaker, there is little signal loss due to destructive interference.
However, this miking configuration does not provide a very wide stereo image. If you're looking for something a bit tighter, this may be the technique for you!
SPACED PAIR
This is probably the most common method for miking overheads. One mic goes above the left side of the kit pointing down, the other goes on the right. Each mic captures the side of the kit that they're on.
This gives you a nice wide image of the kit, however this can certainly introduce some phase issues, and some weird panning side effects. If you match the level of the snare in both mics, your kick drum will end up of to the side, and so will all the toms. Since you typicaly want both the kick and snare in the middle, this presents an issue.
I'll give you a solution to this later.

ORTF
ORTF is similar to XY, however there is a space between the two microphones. Typically, there would be about 17 cm between the capsules of each overhead microphone, and they would be angled 110 degrees apart from each other.
As you might expect, not quite the phase issues as the spaced pair method, but much wider than the XY pattern. Let's call this a happy medium.
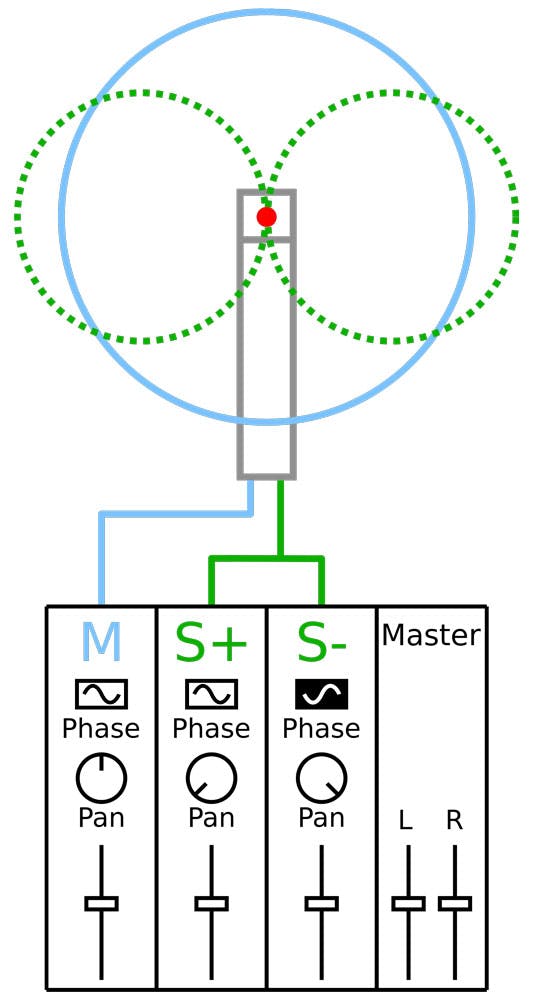
MID SIDE
This technique was a main stay for about three years. Gets an amazing image, folds down to mono nicely, all around great.
The "mid" mic is a cardiod mic pointed directly at the source (usually the snare drum). The "side" mic is a microphone in figure 8 pattern, with the front and back being both perpendicular to the mid mic.
Take the "side" mic, duplicate it in your DAW, then hard pan the original side mic left, hard pan the duplicate right, and flip the phase on one side. Keep the "mid" channel panned in the centre to cancel the phase issues.
The best part of this technique is that when you sum to mono, the "side" channels cancel each other out (as they're 180 out of phase) and you just get the "mid" microphone. So the stereo image adapts into a mono image automatically. Cool!
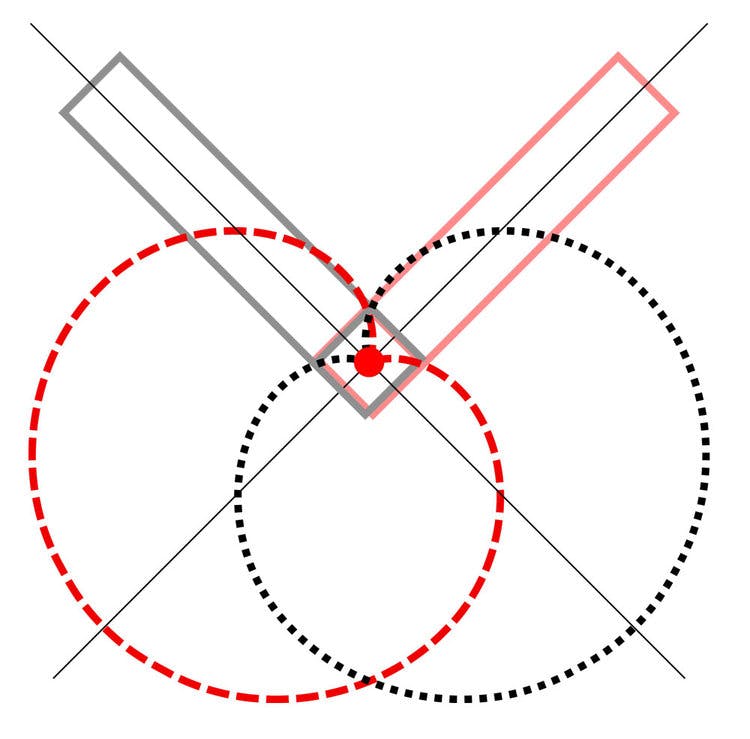
RECORDERMAN
This is a weird one. One microphone goes about 32 inches above the snare and pointing right at it. The other microphone goes right above the drummers right shoulder, also pointing right at the snare.
You then take a string or a cable and clamp it with the kick pedal against the front kick drum head. Then pull it straight up to the microphone over the snare drum. Wrap it over your finger at this point, then pull the remainder down to the middle of the snare. Hold all that in place.
Then move your finger that was near the one microphone to the other microphone. Get as close as you can, and then move the other microphone to wear your finger is. Check out this video for a guide: Recorderman Setup
This technique leaves a gap in the centre of the image for the close mics, leaves the kick and snare in the centre, gets a good wide image, and avoids mono phase issues.
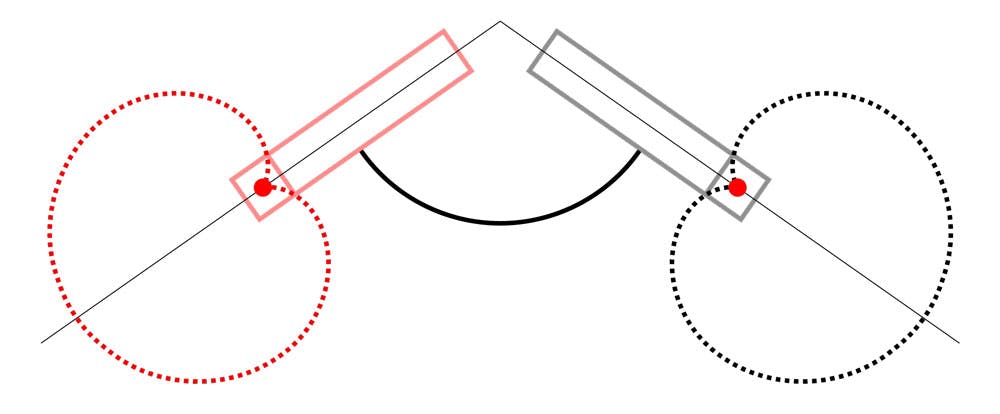
SIDEWAYS SPACED PAIR
So this technique is one of my own, and I don't know what to call it. I've knicknamed it the "Sideways Spaced Pair" for years now, so let's roll with that.
In this technique, we're taking the principles of Recorderman and from Spaced Pair. I want to create the width of a spaced pair, but I like the natural panning of the Recorderman technique.
So, take the middle of snare drum and the front of the kick drum head (beater side), and imagine theres a vertical plane connecting them, almost a halfway point of the kit.
To try another perspective, stand in front of the kit as if you're an audience member. Walk to your left (walk right if a left handed drummer) and continue to face the kit. Find the position where you can point directly at the kit, and the kick drum beater and center of the snare are aligned. That's your vertical plane.
We want to put the overheads equidistant from that mid point plane. So what does this do? It puts the kick and snare in the middle of the stereo image, and it pans the hats and toms naturally in the overheads. It still has the wide image of spaced pair and helps create a better phase relationship. So its got the best of the Spaced Pair technique and the Recorderman technique.
Ok that's it, thanks for reading !